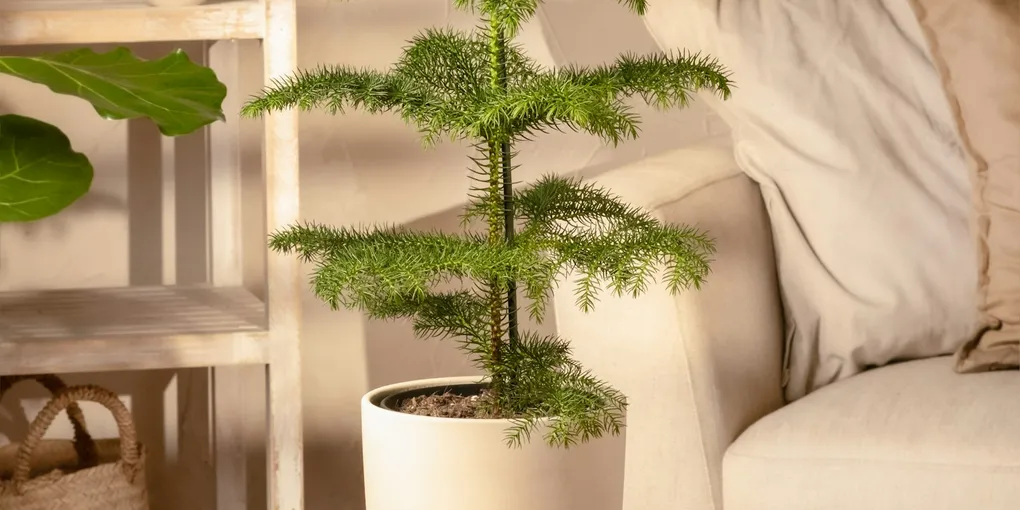
How to Care for a Norfolk Island Pine
Norfolk Island pine (Araucaria heterophylla) shows up everywhere around the winter holidays, sold small and neatly shaped as a “living Christmas tree” you can decorate with mini ornaments and lights. It’s not actually a pine — it’s a distinct conifer native to a tiny South Pacific island — but it does have that classic tiered, symmetrical branch structure that makes it look the part. The catch is that most of these plants decline within a year or two of being brought home, and almost always for the same reason: not enough light. Get that right and this is a slow, long-lived houseplant that can eventually reach several feet tall indoors.
Light
Norfolk Island pine wants as much bright light as you can give it, ideally several hours of direct sun each day from a south- or west-facing window. This is one of the most common misconceptions about the plant — people assume it’s an easygoing low-light option because it’s sold as a compact tabletop tree, but insufficient light is by far the most common reason these plants decline. Too little light leads to sparse, weak growth and branch loss that doesn’t come back. See how much light do houseplants actually need if you’re not sure your window qualifies as bright enough.
This plant also grows strongly toward its light source, so rotate the pot a quarter turn every week or two. Skip this and you’ll end up with a lopsided tree leaning hard in one direction, which is much easier to prevent than to fix later.
Watering
Keep the soil evenly moist, not bone dry and not soggy. Unlike an actual desert plant, Norfolk Island pine doesn’t store much water in its needles and doesn’t tolerate drying out completely between waterings — it responds to underwatering with dramatic drooping and browning that’s hard to reverse. Water when the top inch of soil has dried out, and water thoroughly enough that it drains through the pot rather than just wetting the surface. See watering houseplants the right way for the general finger-test method.
At the same time, don’t let the pot sit in standing water. Roots that stay waterlogged for extended periods will rot, so a pot with drainage and soil that lets excess water pass through matters just as much as not letting it dry out. The goal is consistency in both directions, not one extreme or the other.
Soil and pot
A standard well-draining potting mix works well. Always use a pot with a drainage hole; without one, it’s very hard to avoid the wet, airless soil that leads to root rot. Norfolk Island pines are relatively slow growers, so they don’t need frequent repotting — every couple of years, or once roots are visibly circling the drainage hole, is typically enough.
Humidity
This plant appreciates more humidity than the average dry living room provides, and it’s noticeably sensitive to the dry air that indoor heating produces in winter — which is exactly the season most people bring one home. Low humidity shows up as browning needle tips and increased needle drop, even when watering is otherwise fine. A humidifier, a pebble tray, or grouping it with other plants all help; see how to increase humidity for houseplants for practical options, and winter houseplant care for what else changes once the heat comes on.
Toxicity
Norfolk Island pine is non-toxic to cats and dogs — the ASPCA toxic and non-toxic plants database lists it as safe — which is a real point in its favor given how often it ends up decorated and placed at floor or table level as a holiday centerpiece. If you’re building a pet-friendly plant collection, it’s a genuinely safe pick rather than one you have to keep out of reach — see pet-safe houseplants for cats and dogs for more options in the same category.
Common problems
Browning, dropping lower branches is the issue people run into most, and it’s usually caused by insufficient light, though inconsistent watering and low humidity can contribute too. The frustrating part is that this damage is typically permanent — unlike a lot of houseplants, Norfolk Island pine doesn’t reliably regrow branches once they’ve browned and dropped. That makes prevention far more important than any after-the-fact fix: get the light right from the start rather than trying to reverse the damage later.
Brown, dry needle tips without full branch loss usually point to low humidity or soil that’s been allowed to dry out too often. Check both before assuming it’s something more serious.
Leggy, one-sided, or sparse growth almost always comes down to light — either too little overall, or light coming from only one direction without regular rotation. Move it somewhere brighter and start turning the pot regularly, and new growth should come in fuller.
Needle drop after a location change can happen when a plant is moved from a bright nursery or greenhouse into a noticeably dimmer home, or shifted room to room. Some adjustment shock is normal; picking one bright, consistent spot and leaving it there minimizes it going forward.